
So it's been a bit since I posted an update on my GIANT ENEMY CRAB 2 project (Part One and Part Two), and that's because I have both run into some difficult questions about how I want to design its weapon system, and also because I got some brand new waterjet-cut metal parts from SendCutSend! Now with titanium armor and an AR500 steel weapon, my other bot-in-progress JACKALOPE is just a set of wheels (and maybe a new lid) away from being a fully-functioning combat robot. This is definitely the most dangerous thing I have ever designed and I'm a little nervous about the weapon test once I get these last parts on.
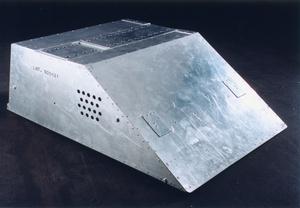
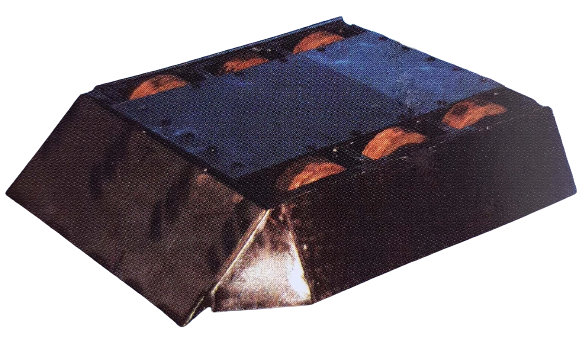
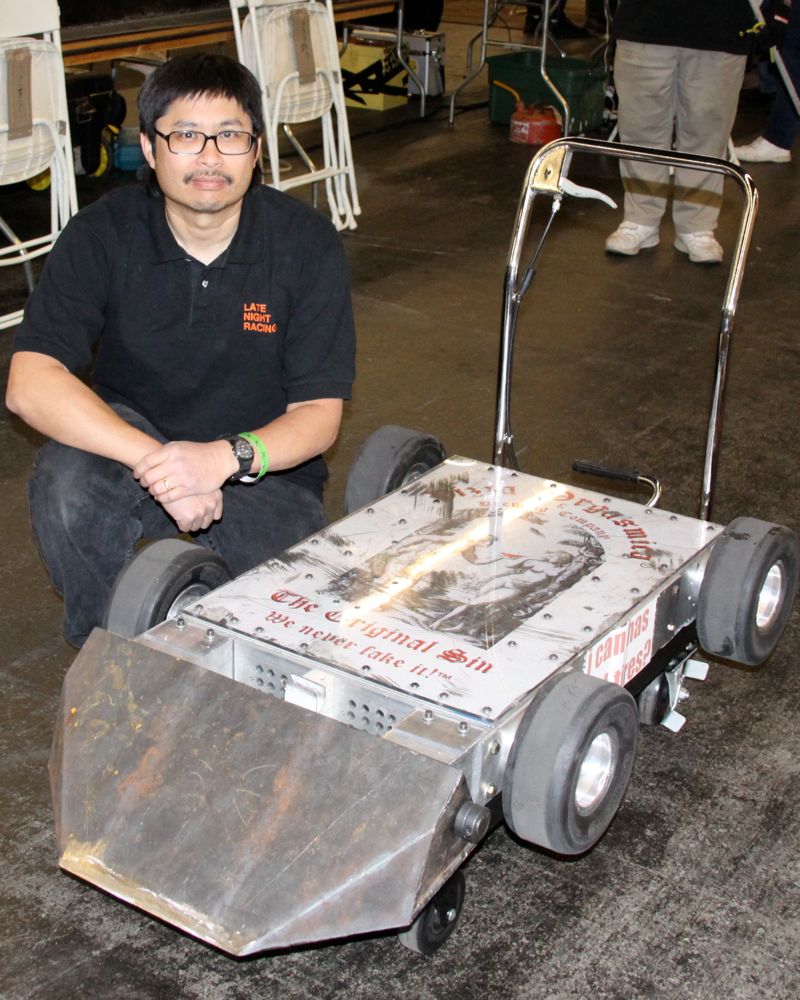
Anyways, to help keep myself active while I decide what I'm doing with GEC2's weapon, I've decided I am going to start on another project - a simple Wedgebot. Wedgebots are the simplest form of combat robot - an armored wedge or plow being pushed around by a robust drive system. Examples include the original La Machine from old-school BattleBots, Storm 2 from Robot Wars, Original Sin and Crash n' Burn from Robogames, and arguably certain iterations of Duck! from the BattleBots reboot. It's a surprisingly effective strategy, breaking your opponents with your face. In fact, many attribute the fall of classic Comedy Central era BattleBots to there being way too many wedge-vs-wedge matches, which usually aren't very fun to watch. In lower weight classes however, Wedgebots are very common and new builders are encouraged to start with them since they are much safer than a bot with an active weapon. They are also very common for beginner kits like the Fingertech Viper, and the Botkits 1lb Candy Wasp and 3lb D2.
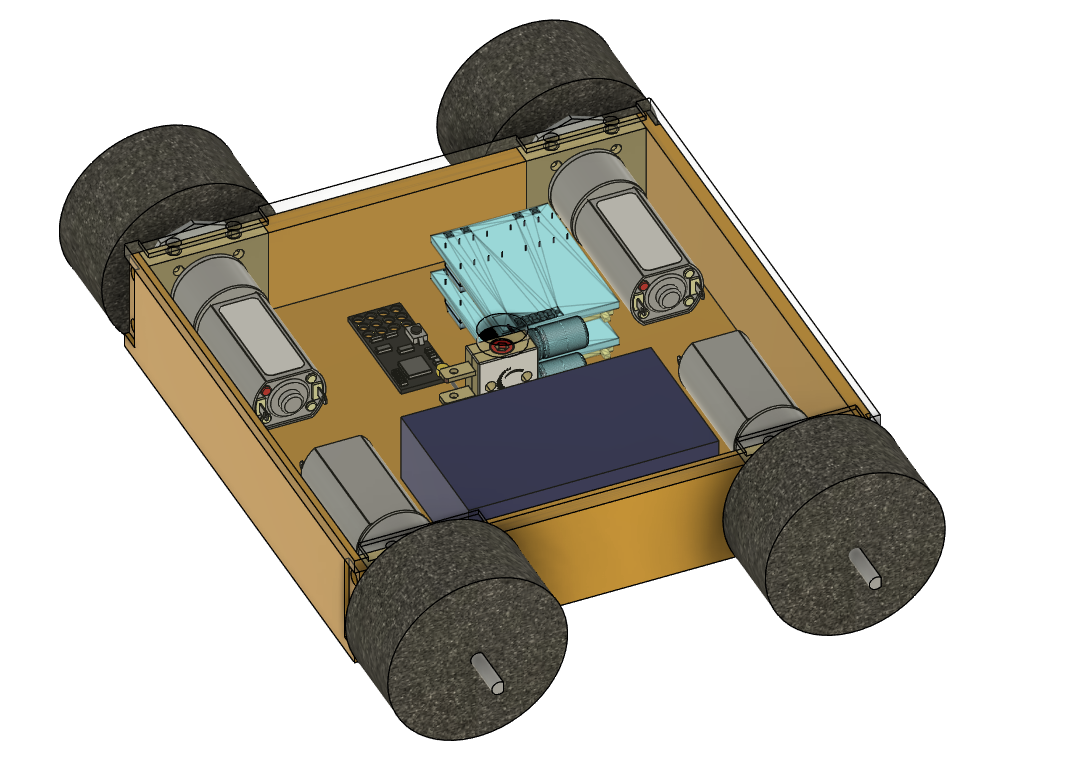
My bot will be very much in line with the Botkits bots - 4 wheel drive using 4 motors, with a separate wedge up front. It will be 1lb like the Candy Wasp, but with a 3d printed TPU chassis (flexible and strong) and aluminum motor mounts, instead of being all billet aluminum. I also have a different wedge design in mind that I think should allow it to function upside-down, unlike the Candy Wasp.
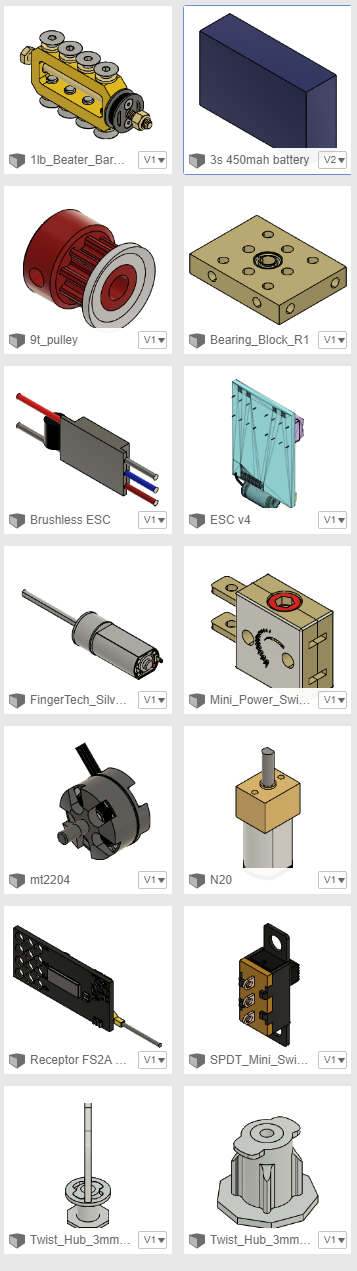
Anyways, to start on this design, I open up Fusion 360 and start pulling parts from my saved parts library of common bot parts that I have been collecting, and arrange them on the workspace. I don't need to worry about any pulleys or weapons or anything so it's pretty simple.
For this bot I will be using:
- 4 Fingertech Silver Spark Gearmotors
- 2 5A Brushed ESCs (1 for front drive, one for rear)
- 1 Fingertech Mini Switch
- 1 FS2A 4 channel receiver (each drive ESC takes 2 channels, so this is perfect)
- 1 3S 450Mah Lipo battery
- 4 Fingertech bearing blocks to mount the motors
- 4 Fingertech 3mmx.75" wheel hubs to mount the wheels
- 1 pair of terminal blocks (not pictured)
Arranged on the workspace they look like this.
Next step is to build a quick little chassis around these components and give it some wheels. 3mm walls and floor, 1.5"x.75" wheels, a couple more adjustments to add mounting holes for the bearing blocks, and pop a lid on top, and it turns into something like this.
Now on its own, this is a fully-functional boxbot. Defenseless and underweight, no obvious way to tell which side is the front, but it will drive. My next step will be to design the wedge mounting system, and maybe some internal walls to hold all the electronic components in place. My next post will likely be about that, and maybe getting some wheels on JACKALOPE so I can take a video of how it works. Or maybe I'll have a breakthrough on the crab again, who knows?
I understand literally none of this and am continually amazed at the diversity of talent amongst our hexbreathren
:hex-crab:
Finally, a comm for that one user who hand-makes
longbowscombat robots. This ones for you, comrade.
Oh hell yeah this is awesome! I'm interested in seeing how strong the tpu is vs nylon or polycarbonate. I usually print the things I need to be tough out of a carbon fiber reinforced polycarbonate that I've had really good results with. But it might be prone to shattering if it was hit hard enough.
You print with polycarbonate? I've heard that stuff is stupid hard to get right. Right now TPU95a is becoming the most popular small bot chassis material because it has a lot of give but is actually super tough. Before that, carbon fiber nylon was popular for 1lb/150g, and UHMW for 3lb bots.
I still do some CF-Nylon prints. The weapon hub and pulleys on Jackalope are made of it, as was the original chassis before I realized TPU would be stiff enough for my needs.
It took me around half a spool of filament the first time I tried to print with it. I eventually got the settings right and now I love it. I use the Priline Carbon Fiber PC. It likes to be printed at around 260-265C, with around 95-100C for the bed temps. I also use a layer of hairspray on the bed to help prevent the part from sticking, otherwise it'll weld itself to the bed. You also definitely have to make sure it's dry or it will not print at all. If it's wet, it'll pop and clog constantly.
Interesting. So is it super hard? Does it flex or is it stiff? Brittle? 265 sounds really low for polycarbonate. Might have to do some research and see how it compares to CF-Nylon.
It's springy and tough. It's very similar to nylon, but less flexible. I say if it's in the budget, grab a spool and test it out.
Here is the first thing I got to turn out while I was still figuring out the filament. The printer I printed this with was the definition of homebrew. So pay no attention to the ringing/ghosting.
https://hexbear.net/pictrs/image/debDnz9k63.jpg
https://hexbear.net/pictrs/image/MBFACje9JO.jpg
I tried to get a picture of the small divots left from ball bearings striking the slingshot handle. This thing is super stiff and super lightweight. The little divots are the only damage it takes when it gets a point blank full power smack from a 3/8" ball bearing. I printed this with 3 walls, 4 top and bottom layers, and 30% infill.
Edit: I'm going to see if I can find something that I've printed recently with it. It actually leaves a very nice surface finish that is slightly matte while also sparkling from the little shards of carbon.
Found something. This is a "VR HOTAS" for the vive wand that I've been working on for a little while. https://hexbear.net/pictrs/image/k01JlemLrT.jpg
From what I understand about battlebots, you have a proven design that can only be improved upon by throwing more money at it. IE
- more armor
- stronger armor
- more powerful motors
- bigger batteries for those motors
After that its just practice at being a better driver than your opponent.
Well I'm a terrible driver so I guess I gotta make up for it with that other stuff. Which is actually part of why I am making this bot. I can disable the weapons on my other bots and practice driving them, but it's unrealistic without having to factor in gyroscopic forces or the friction of a big spinning mass. This bot won't have an active weapon, and should be safe to practice driving as-is.
That wheel should be spinning at rates that will exert tremendous gyroscopic forces that will make turning... interesting. You need to practice with it on. I dont know where you could do that safely. Please tell me how it feels.
Looks great! I'm gonna get into this hobby someday I swear, I love reading these posts.
I love Battle Bots, it's one of the only shows me and my dad could watch together.
I updated the chassis design! The clamshell setup makes it more like the Candy Wasp, but it also seems more secure having 12 points of contact for each chassis half to the aluminum bearing blocks. Next I'll design front and back plates (maybe of a harder material) to mount the front wedge and protect the rear a little. New Design
Hey spring_rabbit, do you have any fancy setup for printing TPU? I've experimented with it a bit on a typical Ender3 v2 (many upgrades, but still the stock extruder / bowden setup) and while it kind of works, I have to fuck around a lot with the slicer settings, slow everything the fuck down, and do a lot of praying. Naturally, a direct-drive extruder would help a lot, but I'm just curious what you've ended up with and how well/poorly it's working.
Right now I use an Ender 3 S1 Pro, stock except for a glass bed. So direct drive and all-metal hotend. Before that I ran an Ender 3 with a buncha upgrades including a MicroSwiss direct drive. I've never tried it with a bowden extruder, but with the direct drive it prints basically as easy as anything else, aside from a occasionally feeding into the extruder wrong when starting a print. It's an easy fix.
Oh wait, it actually adheres to glass? :isaac-pog: I tried doing PLA on glass once just to see what would happen and it was a complete disaster. I should give that a try.
Yeah, the bowden setup is not ideal. Basically a CNC rope pushing machine. It does work fairly well for convex shapes though, but requires a lot of patience. A lot of trade-offs need to be made in the slicer settings, and what works in one situation can be very detrimental in another. The filament has a tendency to knot itself up between the extruder drive gear and the tube opening, killing prints instantly. To counter this, I crank up the temperature to limit the backpressure on the filament, but I gain no speed out of this and it makes the oozing worse. To counter the oozing, and the fact that the filament is stretchy, larger retraction distances are needed, but this feeds back into the knotting problem. I haven't gotten a chance to see if Marlin's linear advance feature would help at all yet.
If I end up dumping any more money into this thing, I guess I'll be getting a direct drive setup.
I love my glass bed. It's the Creality one, but I run it upside down. Makes for a slick smooth surface on the bottom. I use hairspray with it, or white glue when I'm doing the CF-Nylon.
Definitely recommend the Direct Drive. There are even some printable ones I've seen that look pretty decent.
Yeah, I could just print out a bracket and strap the current extruder to the top of the hot end, but I think I'd prefer to get something that weighs a little bit less.


